Trailering and Towing Tips for Pick-up Trucks

1. Stay Within Your Limits. Review the towing capacity of your specific vehicle and ensure it’s capable of handling the weight of your trailer. Exceeding the maximum towing capacity can result in dangerous handling, insufficient braking performance, or serious damage to the vehicle’s suspension, engine, transmission and drivetrain. In addition to ensuring your vehicle’s towing capacity is sufficient for your trailer, also make sure your trailer hitch is capable of handling your trailer’s loaded weight. Your hitch should be labeled with the maximum trailer and maximum tongue weights it can safely support. Depending on the weight of your trailer, you should also follow your owner’s manual’s recommendations regarding the use of weight carrying or weight-distributing hitches.

Don’t assume all versions of a certain model line share identical tow ratings. Towing capacities can differ by body styles, bed lengths, transmissions, engines, drivelines, and other equipment installed on the vehicle. Likewise, different hitch designs can handle different weights, and certain designs may be required for trailers over a certain weight. Always check the owner’s manual for the vehicle’s towing capacity.

If you plan on also carrying extra cargo or several passengers, you should also ensure you’re not overloading the tow vehicle itself. Refer to the gross vehicle weight (GVW) issued for your particular vehicle and ensure your loaded vehicle does not exceed the manufacturer’s rating. Likewise, ensure your loaded vehicle and loaded trailer do not exceed the gross combination weight rating (GCWR) set by the manufacturer.

2. Pack your trailer properly. Not only is it incredibly important to stay within the trailer’s maximum load capacity, but it’s also important to ensure any cargo is properly positioned. Not only do you want roughly 60% of the trailer’s load placed over the front half of the trailer, but you also should load it in a way that results in a tongue weight on conventional hitch trailers that is between 10-15% of the total weight of the loaded trailer. Ensure weight is evenly distributed on the left and right sides of the trailer. Once the load is properly distributed and the ideal tongue weight is achieved, all cargo should be secured to prevent the load from shifting.

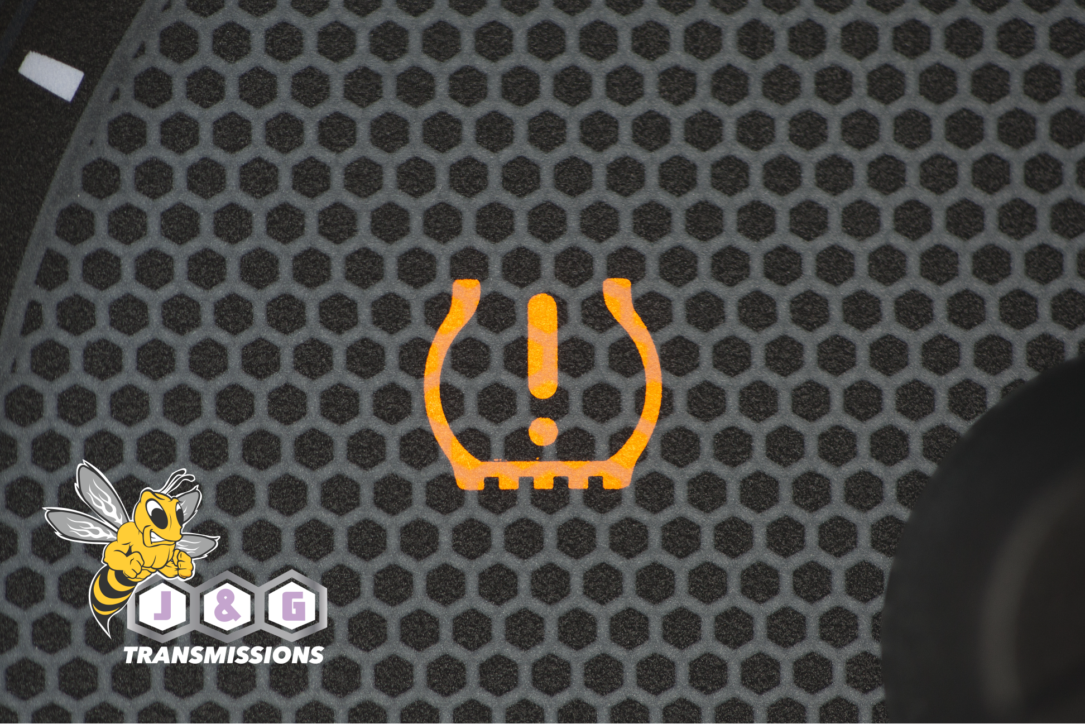
3. Check your tires. This goes for both your tow vehicle and your trailer. Tires that are not properly inflated can negatively affect handling. Further, underinflated tires can create more rolling resistance, which not only forces the engine to work harder and consume more fuel, but also increases tire temperatures and may contribute to a blow-out. Refer to the tire pressure label placed in the driver’s doorjamb for proper inflation pressures for the tow vehicle. Additionally, check the speed rating on the tires for both your tow vehicle and trailer, and ensure you never exceed that speed while on the road.

Preparing for a long trip? Check the tire pressures of the spare tires provided for your vehicle and your trailer and ensure they’re inflated up to spec. Additionally, consider allowing more time to inspect your trailer’s hub bearings before towing, and ensure they’re in good order and properly greased.

4. Check your lights. The taillights and marker lights on your trailer may seem superfluous, but they’re quite important. Large trailers or loads may block the view of the tail lights on your tow vehicle. If the lights on your trailer aren’t illuminated, other drivers may not see your vehicle, especially at night. Accidents can occur if the tail lights are not working. Have someone stand behind the vehicle while it is in park to check the turn signals, tail lights and brake lights function properly.

5. Check Your Brakes. Smaller, lighter trailers may not need trailer brakes of any kind, but heavier trailers, or those designed to carry heavier loads, will usually incorporate a trailer brake system. Most truck manufacturers have trailer brake requirements above varying weights.

Regardless of trailer brake type, make sure the emergency “breakaway” cable is properly attached to your tow vehicle. In case your trailer somehow disconnects from the hitch, this cable is designed to trigger the brakes on the trailer and quickly bring it to a halt.

6. Adjust Your Mirrors. Before taking off, make sure your side-view mirrors are adjusted to create a clear view that extends to the end of the trailer. Many manufacturers offer mirrors specifically designed for towing that extend in order to expand the mirror’s field of vision.

Special thank you to GMC Life for the article content

Visit the J&G Transmissions official blog for more how-to’s for your pickup truck.

How to Tell if Your Transfer Case Output Shaft Seal is Going Bad

Being able to shift on the fly from two to four-wheel drive without having to get out and lock the wheel hubs is a luxury that most of us take for granted, especially during a nasty Utah winter storm. A number of newer vehicles are equipped with part-time four-wheel drive systems, that will engage either manually when the driver selects a two, four low or four high mode. Or, automatically when the onboard computer senses that wheel traction is reduced by weather or road conditions if the vehicle is engineered to do so. The physical part of the vehicle that activates this action is the transfer case, which has an output shaft that delivers power to the drive axle. As vehicles age, the seals that connect these components together can dry up, wear out, or break. If this occurs, they will have to be replaced sooner rather than later to avoid further damages to the vehicle’s drive system.

Where and what is the transfer case output shaft seal?

The transfer case output shaft seal is located on the transfer case of four-wheel drive vehicles. The transfer case physically changes between two-wheel drive neutral, to low four-wheel, and then to drive high four-wheel. Inside the case are a series of gear reductions and chain drives that work together to supply power to the drive axles, giving the vehicle the option of four-wheel drive.

The transfer case output shaft is what connects the driveline to the rear differential or front differential.

The transfer case output seal prevents fluid from leaking out of the transfer case, keeping the internal metal components properly lubricated.

If the seals leak, fluid escapes and cannot properly lubricate the internal components of the transfer case. With time and use the parts inside will wear out and overheat. This can render the transfer case useless and the vehicle will no longer be able to shift into four-wheel drive.

Possible signs your transfer case needs replacement:

Vehicle jumps in and out of four-wheel drive

Sometimes the loss of fluid will cause the vehicle to jump in and out of four-wheel drive without driver activating the switch. This is often caused by broken parts inside the transfer case. If you have a leaking seal, you may notice transmission fluid under your vehicle. More often than not, the vehicle only leaks when it is driving. In this scenario the shaft can siphon and fling the fluid, leaving the driver unaware of the worsening condition. If this is the case, the seal needs to be replaced as soon as possible.

Vehicle has difficulty shifting gears

The seals that keep fluid inside the transfer case and also the transmission, are vital for your vehicle’s ability to shift properly. When fluid leaks from a broken seal, the fluid volume working inside the transmission is reduced. This causes a drop in fluid pressure that is vital for proper operation in an automatic or manually shifted transmission. If you notice that your transmission is having difficulty shifting between gears, you should bring your vehicle into a transmission repair shop for diagnosis as soon as possible. The earlier shifting problems can be diagnosed, often times the lower the cost of the repairs.

Your vehicle makes grinding noises underneath the vehicle

A broken or worn output shaft seal can cause noises under the vehicle. Many times these noises are caused by low levels of lubricants inside the transfer case or metal-to-metal grinding. If you hear noises like this, it’s time to bring the vehicle in for diagnosis.

We are happy to offer a free diagnosis of transfer case or transmission repair issues in our Murray, Utah location.

How to avoid Transfer Case problems

Be vigilant in checking fluids. Even if you do not change the fluids on your vehicle yourself, we still recommend checking the fluids yourself. This practice can save you a lot of money over time.

J and G Transmissions is the best transmission repair shop in the Salt Lake Valley. We are located at 4782 South 500 West, Murray, UT 84123. Call us at 801-262-2321.


Other topics: How to tell if your transfer case is bad

How to Winterize Your Car

Winter is coming to Utah, so let’s talk about how to winterize your car. 

Keep powered up:

Check your battery. Cold weather is tough on your car’s battery. The chemical reactions required to generate power in a car battery slow down in extremely cold temperatures. At 5 degrees F, a fully charged lead-acid battery has only half its rated amp-hour capacity. On top of that, during cold weather, your engine requires more current from the battery in order to get the engine started. Combine less power output with more power requirements and you get a car that won’t start on a cold winter morning. So have a mechanic run a battery load test to see if you need to replace the battery. Even if you don’t, he’ll check for and clean up any corrosion he finds on your posts and connections. The mechanic might also fill your battery with distilled water if needed.

See clearly:

Change your wiper blades and refill your wiper fluid. You need to see the road to drive safely, but the build-up of winter precipitation and salt on your windshield can greatly reduce visibility. Working windshield wipers and a solid supply of wiper fluid will ensure that you have a clear line of sight even in the nastiest snowstorm. Wiper blades are only good for a year. Replace yours if they look frayed or worn. If your neck of the woods gets hit by hard winters, you might consider buying wiper blades designed for winter weather. Top off your wiper fluid reservoir with a brand that has a lower freezing temperature.

Get a grip:

Consider getting snow tires. If you live in an area that’s covered with snow for most of the winter, you should swap your regular all-season tires out for snow tires. Snow tires are made of a softer rubber than all-season tires which allows them to retain flexibility in the bitterest of cold. Snow tires also have tread patterns specially designed to grip into snow and ice. Don’t get the wrong idea about snow tires. They won’t magically remove the chance of you slipping and sliding in your car, but they do provide more traction than the regular variety.

Under pressure:

Check your tire pressure. If you don’t replace your regular tires with snow tires, at least keep them properly inflated during the winter. Cold weather causes air pressure in your tires to drop. For every 10 degree drop in temperature, your tire’s air pressure will drop about 1psi. A properly inflated tire ensures the best possible contact between the road and the tires which is essential for safe traction when driving in wintry conditions.

4X4:

Check your four-wheel drive. Four-wheel drive can provide better traction when driving on snowy and icy roads… that is if it’s working correctly. Have your 4WD checked by a mechanic before winter weather sets in. They’ll ensure the system engages smoothly and that the transmission and gear fluids are at their correct level. Also, if you haven’t used your vehicle’s 4WD in a while, now’s a good time to review how to operate it.

Freeze tag:

Check your anti-freeze mixture. The mixture of anti-freeze and water in your radiator should be about 50:50. (We recommend 100% antifreeze because this is Utah.) This will prevent the coolant in your radiator from freezing. If you want to check the composition of your radiator’s fluid, you can pick-up an inexpensive anti-freeze tester at your local auto parts store.

Stock up:
Stock your car with emergency supplies. You never know when you’ll get stranded on the side of the road in a hellacious blizzard. Be prepared by having your car packed with emergency supplies. Read the article we wrote last year on 13 things you should keep in your car. It could save your butt one day.

Change is good:
Change the oil and adjust the viscosity. In order for your engine to run, it needs proper lubrication from oil. Unfortunately, cold weather reduces the oil’s effectiveness. The colder it is outside, the thicker the oil gets, and thick oil doesn’t circulate through your engine as easily as thin oil. Consequently, your engine doesn’t get the lubrication it needs during start-up and you’re left with a car that won’t start.

To be on the safe side change your oil to one that is thinner to begin with. To find out the proper viscosity (that’s the thickness or thinness of a liquid) of oil you need in the winter, check the owner’s manual for your car. They usually have information on proper viscosity levels for different climates.

Old belts fail at the worst times:
Check your belts and hoses. Cold temps can weaken the belts and hoses that help make your engine run. Check them for any signs of wear and tear and have them replaced if needed. If a belt snaps while you’re driving, you’ll have to wait for a tow truck to come pick your cold, grinchy self  up.


Watch and Learn:

Watch our video on How NOT to Burn Up Your Transmission in the snow. https://youtu.be/KxA-4XWT4Go

TYPES AND BENEFITS OF TRANSMISSIONS

Most vehicles driven in the United States are equipped with an automatic or manual transmission. There are, however, other variations of the automatic transmission that are used today in vehicles such as the CVT (constantly variable transmission) dual-clutch transmission.

Manual Transmissions are the oldest of the four types of transmissions we are talking about. They are also called “Standard Transmissions”. With a manual transmission, the driver has to manually change the gears for the transmission to shift gears to optimize a mix of speed and power. This is predominantly done with a shifting lever located near the center console on the driver’s right. The driver foot pedals will also have a third pedal, known as a clutch pedal. Both the stick shifter and the third pedal are indicators the vehicle has a standard transmission.

Automatic transmissions shift themselves automatically between neutral and other gears based on driver input from the throttle, brake, and automatic shift lever or button. The central computer controls the automatic transmission. Automatic transmissions have some advantages over their manual transmission cousins. They have the potential to be more fuel-efficient when driven under normal conditions. They offer smoother shifting and allow hands-free operation and are more convenient in traffic. Automatic transmissions do not offer the same degree of control as a manual transmission, so you won’t find manual transmissions going away anytime soon.

A Dual Clutch Transmission would best be described as a “hybrid” of the manual and automatic transmissions. Sporty vehicles with dual clutches are quite popular in the United States and especially Utah. Dual-clutch transmissions and popular because it uses two clutches and switches gears faster than a manual or automatic transmission. This combination allows for faster acceleration and slowing.

The RV Preparation Checklist

The RV Preparation Checklist
• Check the RV batteries and make sure they have a full charge
• Flush the RV water system and refill with potable water
• Check for any water leaks
• Check RV Appliances
• Check RV Tires
• Check Fluids in Engine and Generator and Change As Needed
• Inspect The Seams & Seal
• Perform A Full Safety Check

1. Check the RV batteries
Batteries are a great place to start your spring spruce up. Batteries lose up to 10% of their energy per month when in storage and not in use. It’s important to make sure your batteries are fully charged your batteries and have the correct water levels (check your battery manual). If the batteries were removed for storage make sure they are reconnected correctly. Remember! Batteries can be dangerous. Take every precaution, and if you aren’t comfortable messing with them have a service engineer do the process for you.

2. Flush The RV Water Tank, check for leaks and sanitize
• Connect one end of your drinking hose to city water and the other to the RV.
• Run the water continuously through the entire system. You want to remove every trace of the non-toxic RV antifreeze you used to winterize.
• If you have an outside shower hose, be sure to flush that as well.
• If for any reason your freshwater tank had antifreeze added to it you will need to drain off any remaining water from the tank.
• Next, add fresh potable water and turn the water pump on. Open every faucet in your RV and keep the water running until the water runs clear.
• Once clear water appears you can turn off the pump and close the faucets.
• Fill the water heater tank with potable water and flush that system out with fresh water. There should be no remnants of antifreeze in the system.
• Once the system is completely flushed you can replace your water filter cartridge if you have one.

Now it’s time to check for leaks.
Grab a flashlight and turn on the water pump. Wait until the sound of the pump stops. Once the water pump stops and the water is pressurized you can turn the pump off and begin your search. Look underneath your sink cabinets, around the toilet, and inside your basement compartments. Anywhere water might flow you want to watch for potential leakage. Take your time with this process. If you locate a leak be sure to have it repaired before you leave on your first trip of the season.
• Close all the drains and make sure drain plugs are in.
• Use a quarter cup of household bleach per 15 gallons of freshwater (if your water tank holds 30 gallons you will need a half cup of bleach). Combine the bleach with fresh water in a gallon container and then pour it into your partially full freshwater tank. Fill the water tank completely.
• Turn the pump on and let the water run through the faucets.
• In a short time, you will begin to smell bleach. Close the faucets and let the tank sit overnight.
• In the morning, drain all the water from the tank and fill it with fresh water.
• Turn the pump back on and let the faucets run and run until you no longer smell bleach.
• If necessary, you may want to repeat this process over the next couple of days.
Completing this process will give you peace of mind knowing that your water is clean and fresh every time.

3. Check the RV Appliances
If your RV uses propane (Also called LP gas) you need to check the tanks, the connections, the valve, and the firing operation. Propane is often used to operate the hot water, the fridge, and the stove. If something isn’t working correctly have your system checked by a professional. Make sure to have a leak test and a gas pressure test each year. You want to be sure that this highly important system is working safely.

If you have refillable propane tanks check the dates on the tanks. Most people are unaware that their propane tanks expire and must be re-certified for safety. Check yours annually.

Once your propane appliances are in compliance spending some time checking your microwave, air conditioner, fridge, or any other electric appliance in your rig. Make sure you plug into a solid source of 30 or 5- amp power. Many people choose to park their RV at an RV park while they test out their systems each spring.

4. Check the RV Tires
Tires are a hot topic in the RV industry. Some companies say RV tires should be fully replaced every 5 years. Others claim that if properly cared for they can last 10 years. Either way, you must check your tires to be sure they are ready for the season. Your entire home relies on the safety of these wheels, so give them the attention they deserve.

First, check the air pressure. While in storage tires loose pressure. Check your manual and fill each tire according to the recommended PSI. Inspect each tire for tread wear and cracking especially in the sidewalls. If you have any concerns, be sure to have a professional inspect the tires prior to leaving on a trip.

Don’t let a blow out happen to you. Check those tires!

5. Inspect the RV Engine and Generator
Now we are ready to tackle the engine! Yes, the all-important parts that get you where you want to go deserve some attention too.
Start by checking all of the fluid levels and make sure they are full and fresh. If you don’t know what your coach uses look in your owner’s manual or contact your dealer. Here are the fluids you want to check:

• Transmission
• Power Steering
• Engine Coolant
• Engine Oil
• Windshield Washer
• Brake Fluid
• Generator Oil

If you have low fluids in one area this may indicate a problem or a leak. Take some time to figure out what is happening to the fluid. You will want to service your engine and the fluids on a regular basis. If you have been doing that and you have an issue, be sure to take it in to be looked at before you leave on a trip.
Now check all of your gauges. Are they giving accurate readings?
Check all your lights. Check the lights on your trailer and the connections between your RV and your trailer.
Check your registration, insurance and vehicle emissions sticker. Is everything up to date? If not, stop what you are doing and go get it done!
Your generator has been off for a long time and will need to be served according to the manual. Make sure the oil level is correct before you attempt to start the generator. If you didn’t store it correctly, you may have trouble restarting it. Inspect the exhaust area before starting. Do you see any problems? If not, start the generator and plan to let it run for a couple of hours. It doesn’t have to be on full load, but it needs to run for a while to get the engine ready for the season. The last thing you want is to travel without a generator.
Take the time to make sure everything is working properly.

6. Check the RV Seams
Most people forget about their RV seams. This is a mistake you don’t want to make. Each and every seam has leak potential. If you inspect and reseal the seams one or two times a year you are less likely to have a leak.

Start by inspecting the roof and moving down over the body of the rig. Look for any openings, cracks or forms of damage. Is there any separation? Is there a specific area that shows wear? Use RV compatible sealants and research which type of sealant is best for the material you want to repair. If your roof shows wear you may want to consider having it professionally resurfaced and sealed. Ask your local RV dealer for their personal recommendation. If you plan to work on the roof yourself, please be careful.

7. Explore Your Safety
With the outside complete, it’s time to move back in the RV. You will want to check the following devices and update their batteries or have the items inspected and recharged

• Smoke detector
• Carbon Monoxide Detector
• PL Gas Leak Detector
• Fire Extinguisher

These 7 steps are an essential part of preparing for a safe road trip. Don’t skimp. Take the time to inspect each part of your RV’s system. If you are unable to do the work yourself, book a spring session with a recommended RV technician.
If you’re feeling energetic, consider a spring cleaning in the inside of your coach as well. Here are a few things to freshen up:

• Bedding and Towels
• Rugs
• Blinds or Curtains
• Floors
• Inside the fridge and freezer
• Wipe the pantry and the drawers
• Wipe the shelves
• Wipe cabinets inside and out
• Blankets
• Lawn Furniture
• Wash All Pots, Pans and Dishes
• Clean under the sinks
• Wash the windows inside and outside
• Clean the mirrors
• Toss old toiletries and add new

You may not have time to do every step listed, but this list gives you an idea of what may be needed. Every RV will be different. The key is to set time aside to prepare for the RV season. Don’t wait until the last minute and skimp on your safety. If you’ve completed this simple RV preparation checklist you know you have done everything necessary for a great trip.

What about you? Do you have certain items that you think should be placed on the RV preparations checklist? Are there items that you check on your rig that are not listed above? Share your best tips and tricks to help others.

5 Car Noises You Should Not Ignore

Newer cars make driving a real pleasure and require less maintenance. After a while, though, you might start hearing an unusual noise – some of those sounds you should not ignore.

Those sounds may include:

A tapping or banging under the hood that is rhythmic

This type of sound often appears when there is likely a problem with the valves, pistons, or connecting rods. Get it to a mechanic quickly or serious damage may result.

A screeching sound under the hood when starting the engine or accelerating

The screeching sound likely comes from drive belts that power devices running off your engine, such as the air conditioner, power steering, and brakes. When they become worn or loose, you may hear the screeching. It is easy to fix and cheap.

Brakes that squeal when used

If you hear a squealing noise when you step on the brakes, it is probably because you need new brake shoes or pads. Have your breaks checked and replaced if necessary. Don’t ignore it, because they will work less efficiently and may even fail if you do.

A whining or howling

This sound could come from the ball bearings in your wheels. If the sound changes when you turn left or right, it is probably one of the front wheel bearings. If the grinding sound is steady, it is probably your back wheel bearings. It may also be your differential if you have a rear-wheel-drive vehicle.

A popping, clicking or snapping sound when you turn

If you only hear this noise when you are turning, but not when moving straight, it could be one or both of your CV joints. These are located on your front axle and may need to be replaced.

If you live in the Murray, UT area, J & G Transmissions can provide engine, wheel, and other car services to ensure your car is working properly and roadworthy. For more information, call us today at (801) 262-2321 or visit us at https://jandgtransmissions.com.

10 Ways to Prepare Your Vehicle for Fall in Utah

  1. Check all fluids, including engine oil, power steering, brake and transmission as well as windshield washer solvent and antifreeze/coolant.
  2. Check the hoses and beltsto make sure they are not cracked, brittle, frayed, loose or showing signs of excessive wear.
  3. Check the battery and replace if necessary. Make sure the connection is clean, tight and corrosion-free.
  4. Check the brake systemannually and have the brake linings, rotors and drums inspected at each oil change.
  5. Inspect the exhaust systemfor leaks, damage and broken supports or hangers if there is an unusual noise. Exhaust leaks can be dangerous and must be corrected without delay.
  6. Check the engineto make sure it is delivering the best balance of power and fuel economy and producing the lowest level of emissions.
  7. Check the heating system as proper heating and cooling performance is critical for interior comfort and safety reasons, such as defrosting.
  8. Inspect the steering and suspension system annually, including shock absorbers, struts and chassis parts such as ball joints, tie rod ends and other related components.
  9. Check the tires, including tire pressure and tread. Uneven wear indicates a need for wheel alignment. Tires should also be checked for bulges and bald spots.
  10. Check the wipers and lighting so that you can see and be seen. Check that all interior and exterior lighting is working properly and replace worn wiper blades so you can see clearly when driving during precipitation.

If you need more information on transmission service in Salt Lake or Salt Lake transmission repair, please visit www.jandgtransmissions.com or call J and G Transmissions at  801-262-2321.

Changing Temperatures and Tire Pressure

Changing weather and temperatures have an impact on your vehicle’s tires. Although the changes may be rather small, it can impact the life of your tires and your wallet. Tire pressure normally changes about one pound for every ten-degree change in temperature.

Every vehicle manufacturer has a recommended pressure for each tire. The pressure is always the recommended pressure when the tires are still cold. Driving with a higher or lower air pressure than the recommended amount will lower the life span of the tire.

Tires will naturally experience a rise in temperature as the vehicle is driven and as the outside air temperature rises. If a tire is underinflated, more of the tire comes into contact with the road surface. This will wear out a tire faster and make your vehicle slower to respond.

When a tire is overinflated, it means that less of the tire is in contact with the road. This will also shorten the life of the tire and give you less control and braking ability.

As far as fuel economy goes, when a tire is underinflated, it will lower your gas mileage. This will occur at a rate of 0.2% for every pound of lower average pressure of all the tires.

Do not fill your tires up to the pressure shown on the tire. This is the maximum air pressure and if you fill it up to that pressure you will shorten the life of your tire. Refer to the label on the door of your vehicle or to your car’s manual for the correct pressure.

If you live in the Murray, UT area, J & G Transmissions can help ensure you get the right tires for your vehicle and that they are properly inflated. For more information, call us today at (801) 262-2321 or visit www.jandgtransmissions.com.

9 Tips to Prevent Auto Break-Ins

1. Lock the doors and close the windows.

2. Get tinted windows if possible.

3. Don’t leave your car running; even in your driveway. Most thieves will scope out an area and watch for patterns before stealing. They also choose times most likely to offer opportunities such as snowy mornings.

4. Park your vehicle in well-lit areas.

5. Hide any valuables. What you may not think as valuable, might be to someone else. 

6. Invest in an anti-theft system & advertise it. Many anti-theft systems come with stickers. Post those stickers in your windows. If they don’t come with a sticker, order one from the manufacturer. 

7. Park your vehicle in your garage when possible. That’s right, it’s time to clean out the garage and let the car sleep in the garage. 

8. Don’t advertise your stereo. This is the opposite of the anti-theft stickers. Don’t put stereo stickers in the window. 

9. Do not leave your garage door opener in your car and leave the car in the driveway.
🚔#nightoutagainstcrime
 🚓

Does Posture Matter While You Drive?


Does Posture Matter When Driving?

While most drivers like to be relaxed when driving, doing so with incorrect posture can result in more serious injuries when in an accident. Although not all cars provide the same options for drivers, you will be safer on the road if you adjust your posture according to the following tips.

1. Completely Support Your Back

Support your back with the seat from your tailbone all the way up to your neck. If your seat is not fully adjustable with lumbar support, you can add a rolled-up towel behind you for better support. Lumbar support pads and devices are available on Amazon.com. Being completely supported will lower injuries to your back if involved in an accident.

2. Get Some Distance Behind the Steering Wheel

Sitting too close to the steering wheel raises the possibility of greater injury to your chest, head and neck, when involved in a head-on or rear-end collision.

3. Lean Back Some

Your seat should be angled slightly backward – a little more than 90 degrees. At about 100 degrees, you will have the least amount of pressure on your back. If sitting too far back, it causes your neck to move forward which can lead to neck and shoulder pain.

4. Sit High Enough for Good Vision

As you drive, your eyes should be at least three inches higher than the steering wheel. This enables you to have a clearer field of vision.

5. Set Your Mirrors

Before you drive, adjust your mirrors so that they let you see traffic behind you without having to move your head. This enables you to see what is happening around you with less neck strain.

If you live in the Murray, UT area, we would like to help you maintain your car for every season. For more information, call J & G Transmissions today at (801) 262-2321 or visit our website www.jandgtransmissions.com.